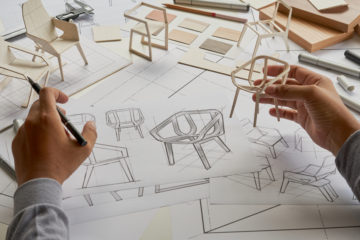
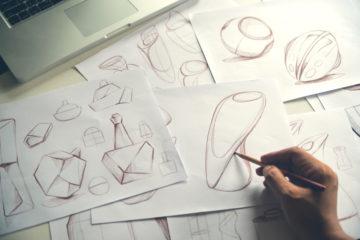
In a world where everyone’s attention is pulled in all directions, the details of product branding matter. Companies strive to make a lasting impression on the customer, driving brand awareness, familiarity, and a relationship between the company and the customer. One effective way to achieve this is through the incorporation of logos on their injection moulded parts which can be costly if laser etching, pad printing, or using labels. Branding methods that are used in the injection moulding tool save not only extra branding cost, but also offer better durability than other methods. When it comes to in-mould branding, three techniques stand out: embossing, debossing, and surface finish.
What is Embossing, Debossing, And Surface Finish?
Embossing and Debossing are often confused. Embossing is when the material is raised from the surface of the part, and debossing is when the material is lower than the surface of the part. How I personally distinguish the two is to think that “de”bossing is where the feature is “de”pressed into the surface. When embossing or debossing a logo on a product’s surface, the opposite or negative of that shape is made in the moulding tool.
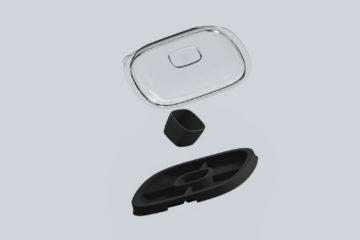
![]()
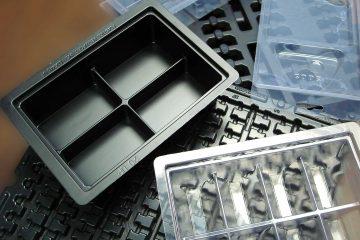
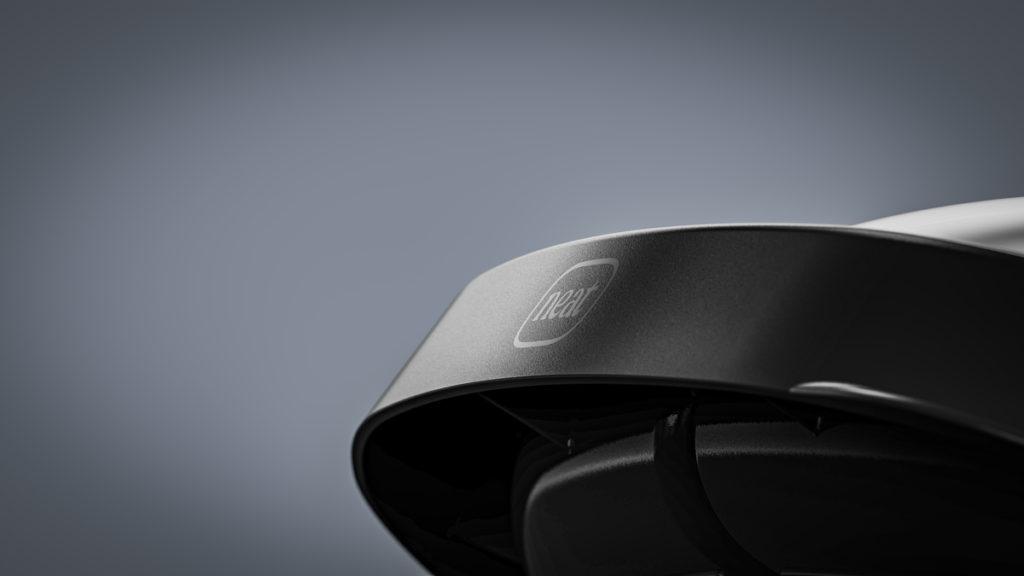
ServeNeat’s Serving Platter incorporates both a raised embossed logo in the lid (left), and a surface finish-made logo on the base (right). Whilst the embossed logo is suited to clear materials with high refraction like PMMA & Polycarbonate, the surface finish logo on the tray is complimentary with only subtle branding.
As for using surface finish; quite simply you can adjust the surface texture of the part in the shape of your logo for a clean, seamless logo application on your product. This often offers a sleek, subtle brand/graphics placement that is great ensure your product can be traced back to your brand, without detracting from its overall look.
Why Emboss, Deboss, or Adjust Surface Texture?
Embossing, debossing, or texturing logos on your injection moulded parts offer numerous benefits. These methods provide durability, as the logo is moulded directly into the material, making it resistant to wear and tear and eliminating the risk of fading or peeling over time as opposed to other options like laser etching, pad printing, or using labels. In-mold logo options will result in a long-lasting representation of your brand.
How Much Is Too Much?
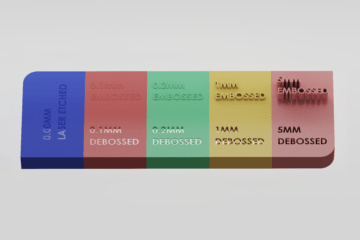
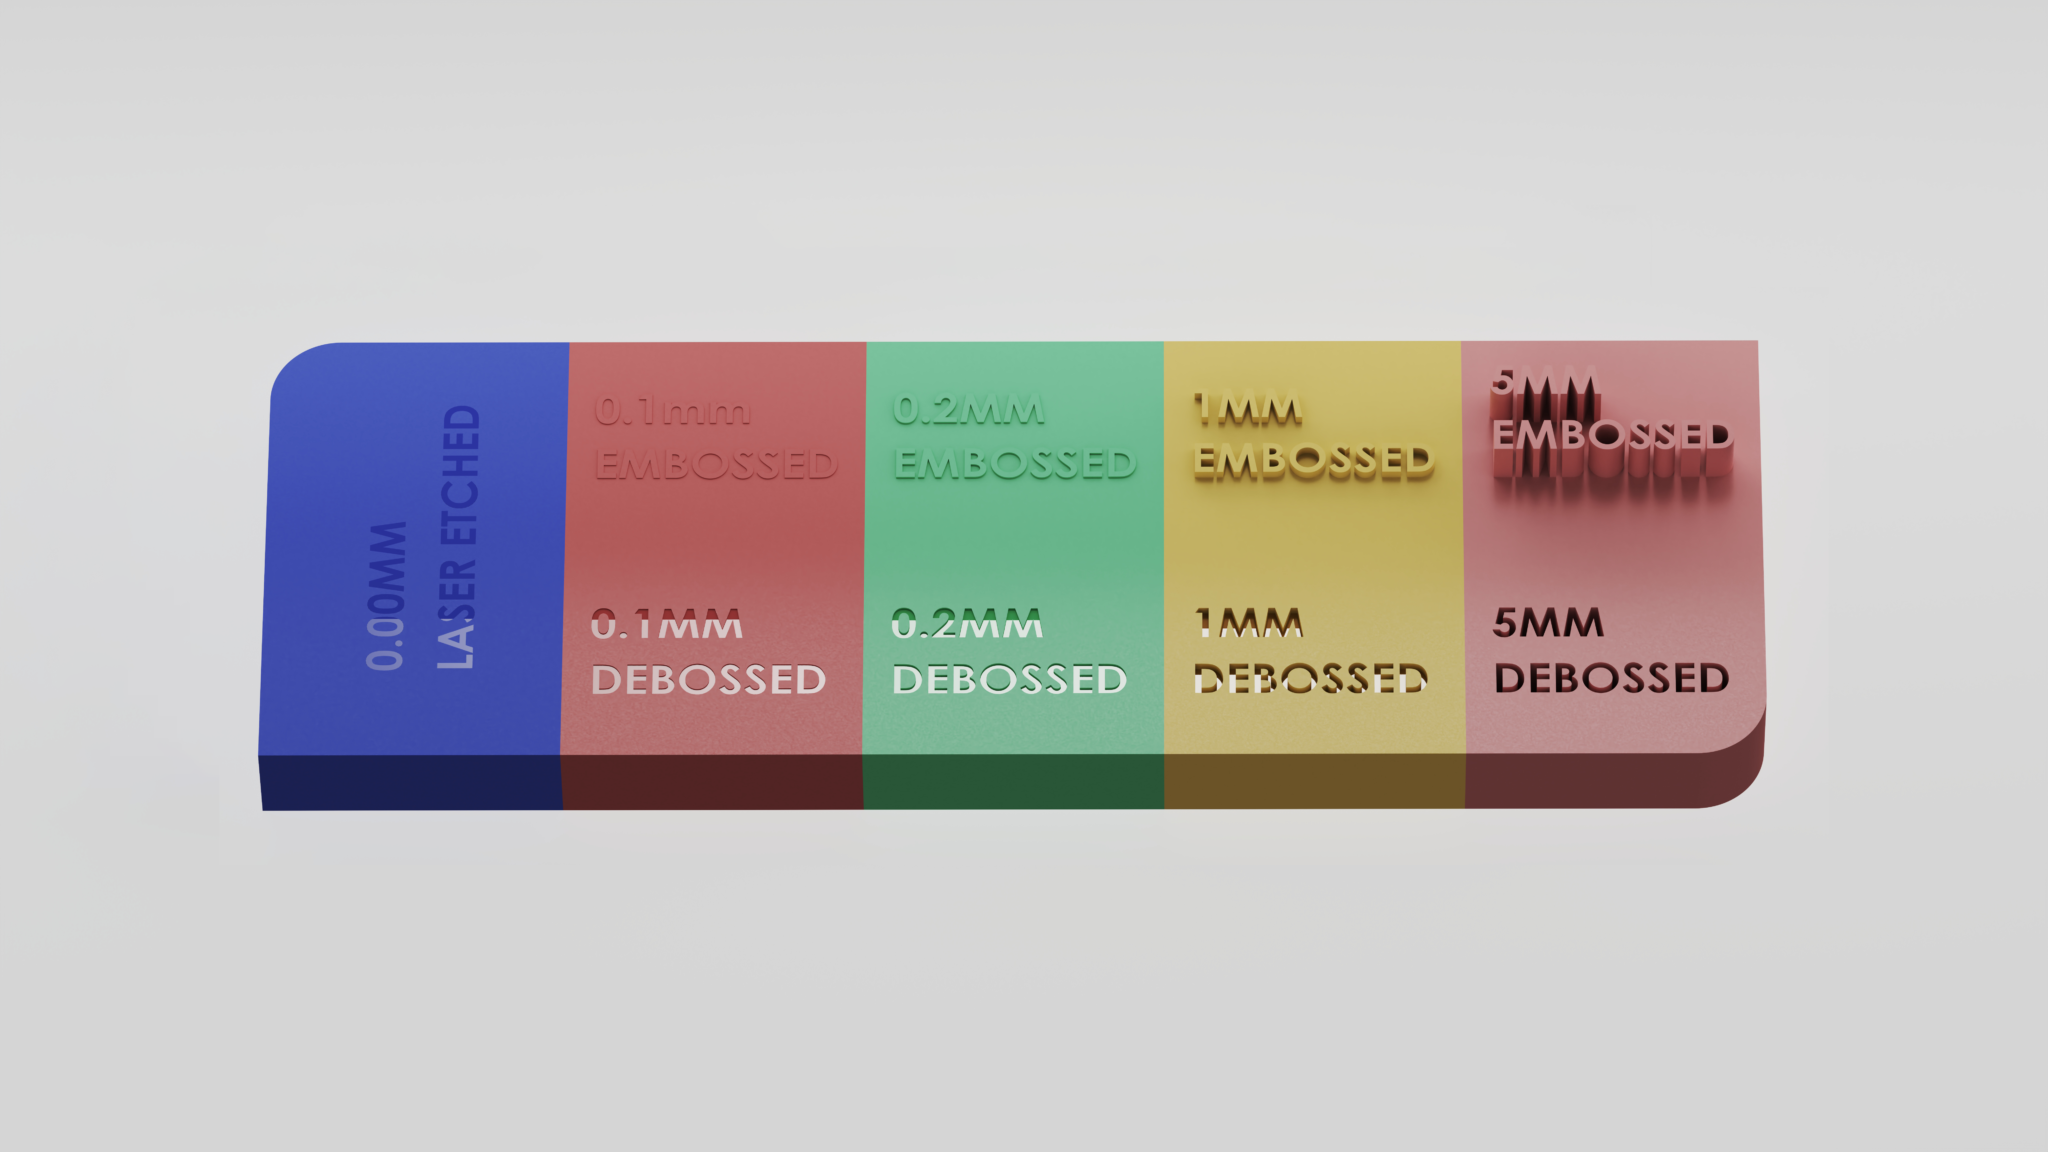
There is a common misconception that a logo must extend from the surface by at least 1mm or more in order to be noticeable. At times, we receive numerous suggestions regarding how far individuals want their logo to be recessed or protruded. To address this, we recommend laser etching for those seeking a subtle logo that seamlessly integrates with the product, or a minimal emboss or deboss of approximately 0.2mm. To provide a visual reference, we have prepared some examples demonstrating the ideal levels of logo extrusion or indentation. A logo depth of 0.1mm may be too subtle to catch attention, particularly if a different surface finish is not employed for your logo. On the other hand, a 0.2mm depth is generally considered optimal, as it allows the logo to stand out adequately without creating sharp corners or causing the part to stick during ejection. While a protrusion of 1mm is feasible, it increases the risk of ejection issues and may hinder the smooth removal of the part from the mould. As you can see, embossing and debossing more than 2mm is impractical and absurd. It is crucial to strike a balance between visual impact and functional considerations to ensure a successful integration of your logo onto the part.
Common Problems and Solutions
Logo/Branding Changes
Furthermore, logos frequently undergo changes or updates within a few years. Fortunately, there exists a simple solution to address these issues effectively: logo inserts. These inserts are blocks that can be easily replaced in and out of the tool. By placing the logo on an insert, any damage or necessary updates can be easily resolved by creating a new logo insert and replacing the existing one. This approach significantly reduces the need for replacing the entire tool, providing a cost-effective and efficient solution to maintain the integrity and longevity of your logo.
While embossing and debossing techniques are highly effective, they can sometimes result in the formation of witness lines—subtle marks or imperfections on the surface of the moulded part where the insert meets the tool. Fortunately, innovative toolmakers and designers have devised a clever solution. A border is often incorporated around the logo or text, effectively concealing these witness lines. By transforming the problem into a feature, it becomes possible to hide and avoid any visual inconsistencies.
Wear & Tear
Embossing and debossing can present certain challenges, particularly related to the wear and tear of intricate details. Given that logos often contain intricate elements, any signs of wear and tear, such as deformation of letters, can become noticeable. This is more present in embossed features, as the logo is raised from the surface and are often catching points for abrasion and scrapes. On the other hand, debossed features are protected from abrasions and can be more durable in the long run.
Importance of Surface Finish
Regardless of whether you choose embossing, debossing, or using a surface finish, a suitable surface finish for both the graphic feature and the surrounding surfaces is crucial. A smooth and consistent finish enhances the visual impact of your logo, ensuring it stands out prominently on the product. To make your logo stand out, it is customary to have a distinct surface finish for the logo compared to the rest of the part.
Ideally, the main surface of the product should have a slightly rougher texture (achieved through Electrical Discharge Machining), while the logo itself should be polished, or vice versa. When a logo is debossed, it is considerably easier to polish or roughen the tool/mould as it is raised from the rest of the tool (the opposite/negative of the debossed feature in the part). Alternatively, embossed logos are much harder to polish in the tool as now you’re polishing inside a small depression which makes access difficult.
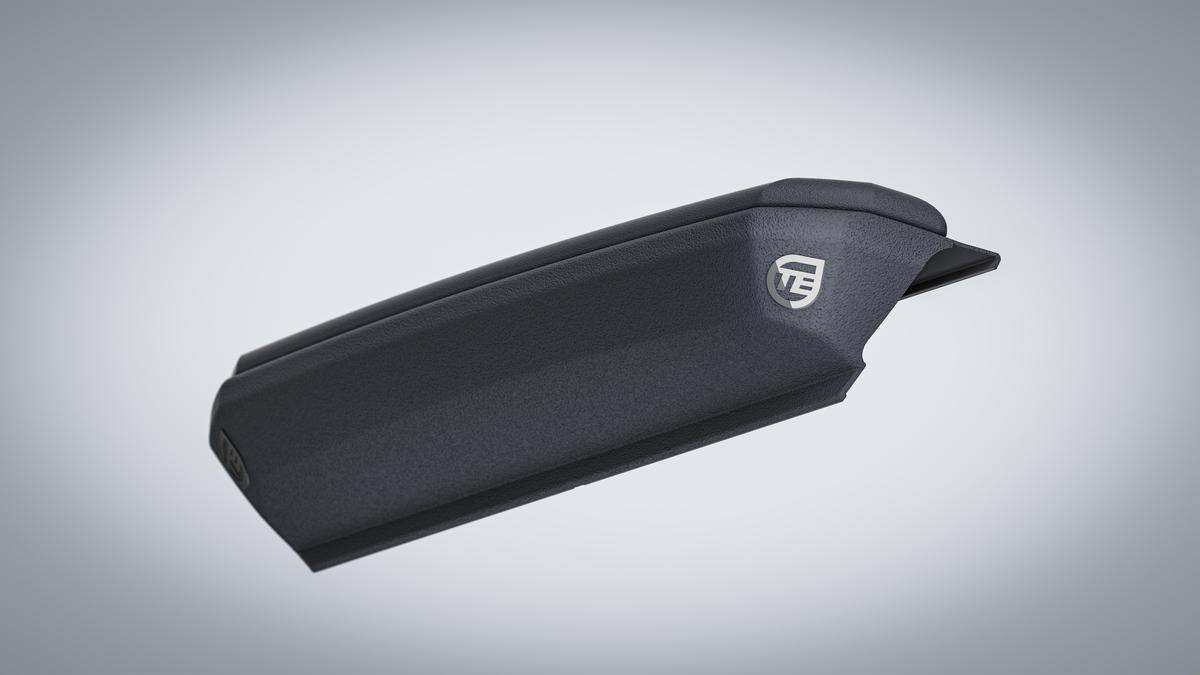
This Land Cruiser Arm Rest we designed for Cruiser Consoles uses surface finish and contrast to great effect. It contrasts a polished embossed logo against the classic, EDM-machined texture to accentuate the logo, reflecting light differently to the surrounding surface of the part.
Alternative Branding Options
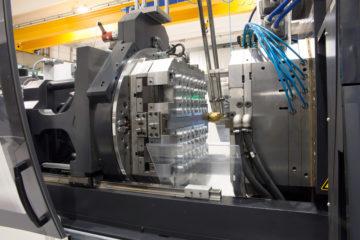
In scenarios where the wall of the part is close to vertical, embossing, debossing or surface texture may not be feasible as the tool is moving along an angled face. Here is when you would use other options such as laser etching, pad printing, or labels. These options are applied to the part after it is moulded, so increases production cost where the in-mould options mainly increase tool cost. As a quick overview, laser-etching uses a laser to etch or engrave the desired shape into the product, pad printing using a printing press to apply a chemical imprint of your graphic to the product in whatever colour you want, and labels are what they sound like – printed labels that you then apply to the product as a sticker. There is also the option of in-mould labelling – where a label is set into the mould and the plastic is injected around this label – though you’ll find that the main tooling suppliers who provide this are dedicated manufacturers of containers and buckets.
Keep an eye out in future for a blog providing an in-depth overview of the various methods of applying a logo and graphics to your product.
Conclusion
When it comes to branding on injection moulded parts, embossing and debossing logos provide a distinct advantage, offering durability and consistent reproduction. By strategically designing around witness lines and exploring alternatives like laser etching, you can achieve impeccable results even on challenging surfaces. Remember that logo extrusion is not always necessary for a memorable impression, and a suitable surface finish adds that final touch of finesse. Choose the method that best suits your product and brand image, and let your logo leave a lasting impression in the minds of your customers.
If you’re up to the stage of putting your logo on your product, or you want to know about getting to that stage, why not book in for a free consultation to get your product design journey started?
At Dienamics, we offer a range of comprehensive services in every step of the product manufacturing process. These include:
- Product design, including concept assessment and project scoping
- Prototyping and process and materials testing
- Manufacturing, injection moulding, production, assembly, and packaging
Contact us today if you have a product you’re looking to get designed & manufacture!
Subscribe to Our Newsletter
Get the latest news from Dienamics into your inbox